|
|
The Talking 4x4 Keypad Matrix Processor Set Version#2 DIY Electronics Kit
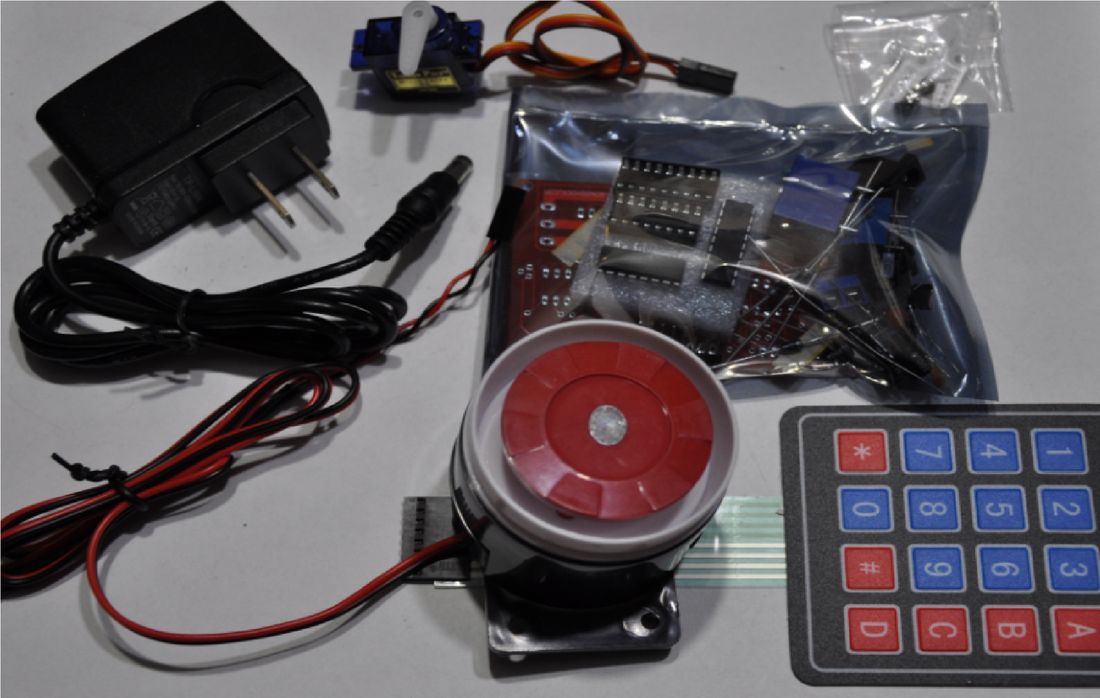
The first thing that you need to know is that we well many different variations of this set. There is an arduino compatible version (Version#1), and a talking version (Version#2). We also sell these in both DIY kit form and in fully assembled/tested form. This listing is for a Version#2 Talking 4x4 Keypad Matrix Processor DIY electronics kit that includes a servo motor, loud siren, wall adapter, a fully assembled/tested version#2 board, a 1-Watt 8-Ohm speaker, and one 4x4 matrix keypad of your choice. You solder it all together yourself with a trusty soldering iron. How? Below you can find a detailed assembly video that shows you how to solder it all together piece by piece. Just follow along with me. There are three different keypads to choose from. The keypad options are listed below. After purchase, we will communicate with you as to which keypad you'd like. The above video acts as a video manual that shows you how each unit works, how to program in codes, and how to hook up everything properly. After purchase, I'll send you a comprehensive user manual. The above video servers as a user manual, while the video below shows you how to solder the board together!
Functionality:
There is entirely too much to cover in this section, but I will go over the function briefly. More importantly, you should take a few minutes to watch the above video. Version#2 is covered in the first section, so you'll have to skip ahead in the video if you want to see a demonstration. The video goes over everything. It talks about both the version#1 and version#2 boards. If you are interested in the version#1 board, we sell that in separate listings in both DIY kit and assembled form. Just check out our store listings! When you receive your set, follow the plug-in section of both the downloadable manual and the above video.
Once you've assembled your kit, and you've connected all of the peripherals, connect power to your device. The device will tell you to "Enter Combination". This device has five commands. It talks to you! You'll have to program in two 4-digit codes; one for the servo (Unlock), and one for the loud siren or relay (Panic). First you'll need to connect the PRG jumper, and follow the programming instructions in the above video and in the downloadable manual. Don't worry. It isn't difficult! Once these codes are programmed (Programming is easy!!!), these codes will be saved into internal EEPROM memory and saved. If the device powers off, it will still remember the codes. You can re-program these codes at any time, as long as you follow the programming instructions. From here, when you enter in the unlock code, the included servo motor will move 90 degrees for five seconds, then revert back. This is to be used as a locking circuit. Once the servo reverts back to the zero state, you can enter in another combination. If you take too long, device will say "Timeout", and you'll have to enter in a new combination. If you enter in an incorrect combination, the device will say "Incorrect Combination". If you enter in the panic code, the on-board relay will turn on, and, if you have the loud siren connected, it will activate for a minimum of 5 seconds. The red indicator LED will also turn on for these five seconds. After five seconds elapse, the red LED will turn off, which means that you can turn the siren off by pressing button#1 on the matrix keypad. At this point, the board will reset, and it will prompt you again to "Enter combination". When you enter into program mode, the device will say "Enter Program Mode", then "Enter Combination". Enter in the relative code, and the device will say "Code Programmed", then "Enter Combination". Once your codes are saved, remove the PRG jumper, remove power for 10 seconds, then power up again. Without that programming jumper, you cannot program in new combinations.
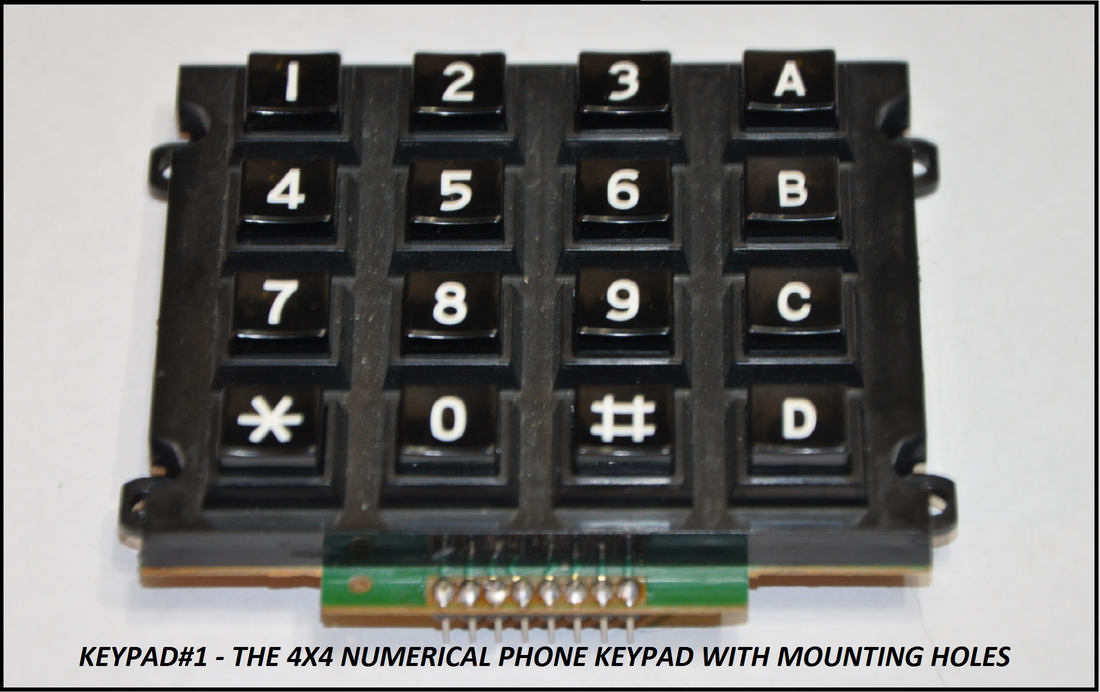
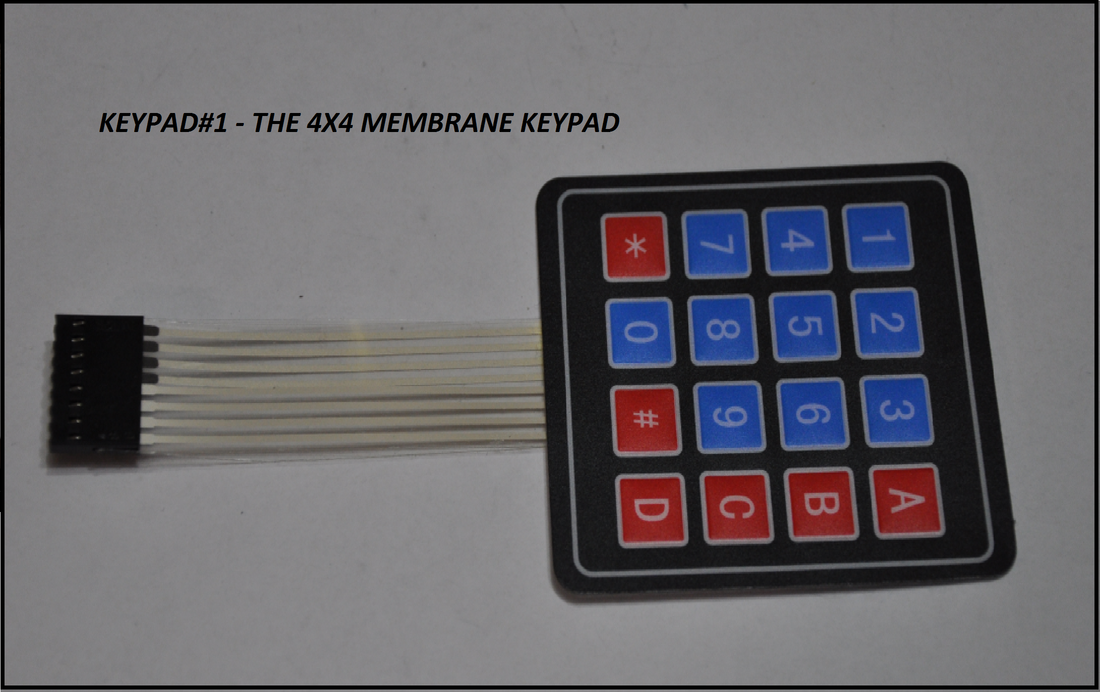
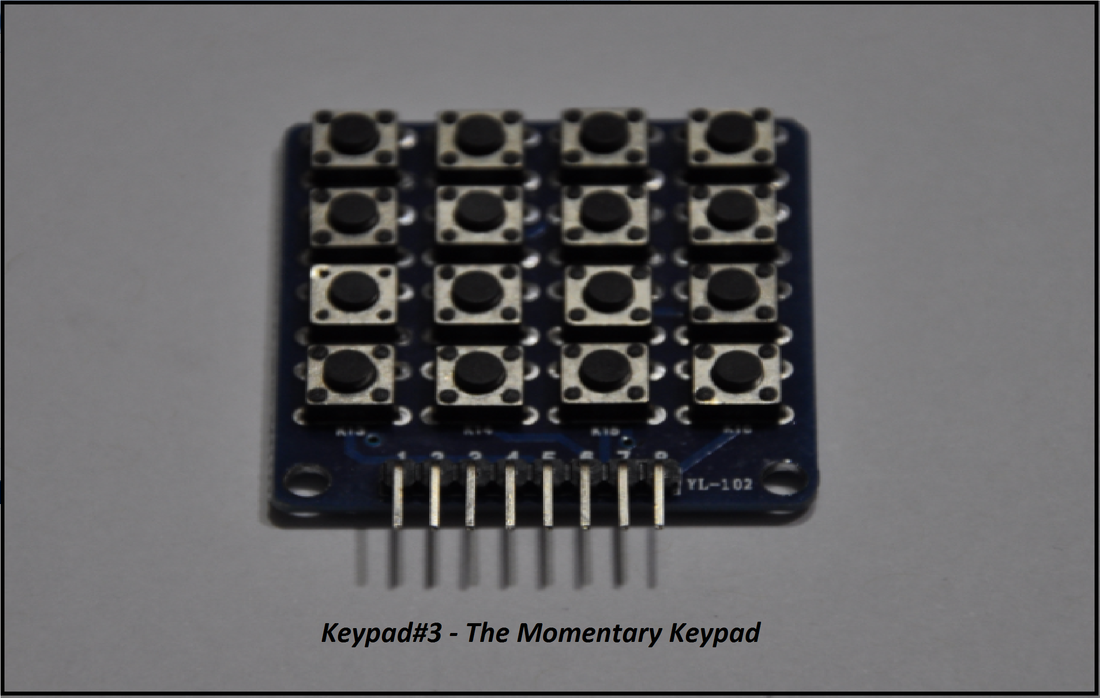
Which Keypad Should I Choose?
When you purchase this listing, I will contact you about which keypad you'd like to choose. In the pictures, you'll see a numeric keypad (Keypad#1), a membrane keypad (Keypad#2), or the momentary keypad (Keypad#3). In the pictures, you will see that the membrane keypad is labelled as Keypad#2, but it is actually keypad#2. You can choose from any one of these.
When you purchase this listing, you will receive the following:
1x Fully Assembled Version#2 DIY Electronics Kit (Version#1 Is Arduino Compatible // Version#2 Talks To You)
1x Wall Adapter (120-240VAC IN // 9VDC 1A OUT)
1x Micro Servo Motor With Attachments
1x Loud Siren
1x 1-Watt 8-Ohm Speaker
10x Female-Female Wire Connectors
1x Keypad Of Your Choice (After purchase, we work this out)
1x Downloadable Manual (After purchase, I'll send this to you.
The Version#2 4x4 Matrix Processor Board Features:
- 2x Programmable codes that are saved into EEPROM memory, so that the codes are saved after power off.
A) The Panic code - Activates the loud siren when connected. If you'd rather, you can choose to use the on-board relay to switch an external device on and off as opposed to the siren.
B) The Unlock Code - Activates a servo motor, and drives it 90 degrees for fives seconds. After 5 seconds have elapsed, the servo motor reverts back to the zero state.
- Easy programming & reprogramming.
- This device talks to you.
- On-Board relay switch option.
- LED indicator.
ASSEMBLY VIDEO:
Functionality:
There is entirely too much to cover in this section, but I will go over the function briefly. More importantly, you should take a few minutes to watch the above video. Version#2 is covered in the first section, so you'll have to skip ahead in the video if you want to see a demonstration. The video goes over everything. It talks about both the version#1 and version#2 boards. If you are interested in the version#1 board, we sell that in separate listings in both DIY kit and assembled form. Just check out our store listings! When you receive your set, follow the plug-in section of both the downloadable manual and the above video.
Once you've assembled your kit, and you've connected all of the peripherals, connect power to your device. The device will tell you to "Enter Combination". This device has five commands. It talks to you! You'll have to program in two 4-digit codes; one for the servo (Unlock), and one for the loud siren or relay (Panic). First you'll need to connect the PRG jumper, and follow the programming instructions in the above video and in the downloadable manual. Don't worry. It isn't difficult! Once these codes are programmed (Programming is easy!!!), these codes will be saved into internal EEPROM memory and saved. If the device powers off, it will still remember the codes. You can re-program these codes at any time, as long as you follow the programming instructions. From here, when you enter in the unlock code, the included servo motor will move 90 degrees for five seconds, then revert back. This is to be used as a locking circuit. Once the servo reverts back to the zero state, you can enter in another combination. If you take too long, device will say "Timeout", and you'll have to enter in a new combination. If you enter in an incorrect combination, the device will say "Incorrect Combination". If you enter in the panic code, the on-board relay will turn on, and, if you have the loud siren connected, it will activate for a minimum of 5 seconds. The red indicator LED will also turn on for these five seconds. After five seconds elapse, the red LED will turn off, which means that you can turn the siren off by pressing button#1 on the matrix keypad. At this point, the board will reset, and it will prompt you again to "Enter combination". When you enter into program mode, the device will say "Enter Program Mode", then "Enter Combination". Enter in the relative code, and the device will say "Code Programmed", then "Enter Combination". Once your codes are saved, remove the PRG jumper, remove power for 10 seconds, then power up again. Without that programming jumper, you cannot program in new combinations.
Which Keypad Should I Choose?
When you purchase this listing, I will contact you about which keypad you'd like to choose. In the pictures, you'll see a numeric keypad (Keypad#1), a membrane keypad (Keypad#2), or the momentary keypad (Keypad#3). In the pictures, you will see that the membrane keypad is labelled as Keypad#2, but it is actually keypad#2. You can choose from any one of these.
When you purchase this listing, you will receive the following:
1x Fully Assembled Version#2 DIY Electronics Kit (Version#1 Is Arduino Compatible // Version#2 Talks To You)
1x Wall Adapter (120-240VAC IN // 9VDC 1A OUT)
1x Micro Servo Motor With Attachments
1x Loud Siren
1x 1-Watt 8-Ohm Speaker
10x Female-Female Wire Connectors
1x Keypad Of Your Choice (After purchase, we work this out)
1x Downloadable Manual (After purchase, I'll send this to you.
The Version#2 4x4 Matrix Processor Board Features:
- 2x Programmable codes that are saved into EEPROM memory, so that the codes are saved after power off.
A) The Panic code - Activates the loud siren when connected. If you'd rather, you can choose to use the on-board relay to switch an external device on and off as opposed to the siren.
B) The Unlock Code - Activates a servo motor, and drives it 90 degrees for fives seconds. After 5 seconds have elapsed, the servo motor reverts back to the zero state.
- Easy programming & reprogramming.
- This device talks to you.
- On-Board relay switch option.
- LED indicator.
ASSEMBLY VIDEO: